
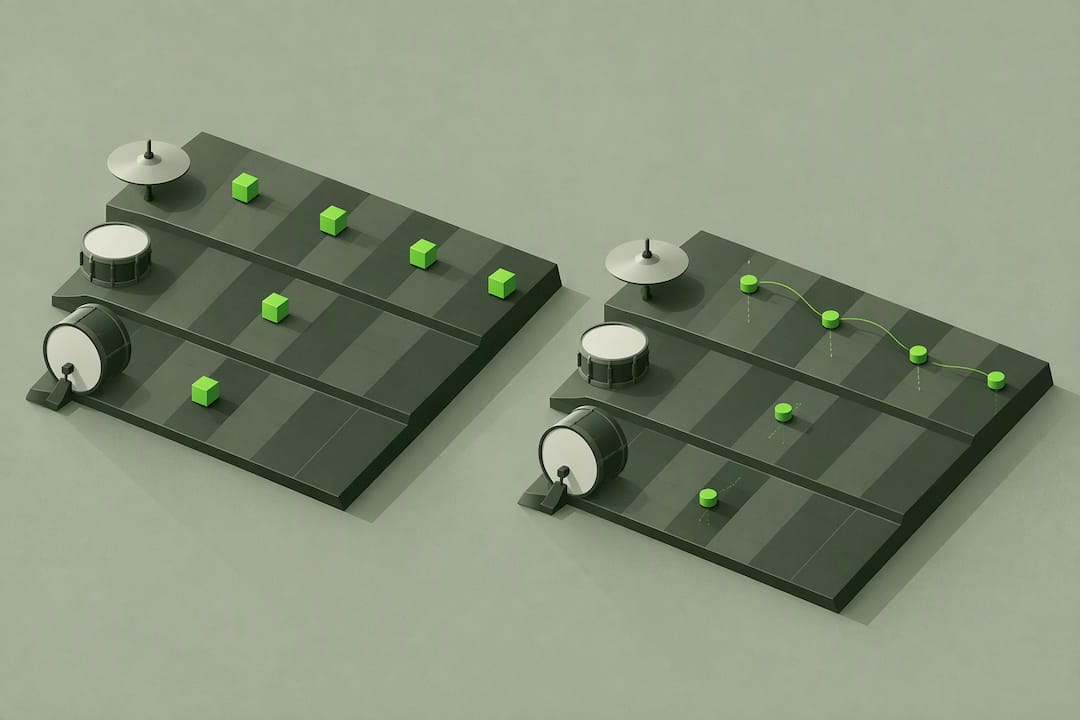
Set a drum map, program layered velocities for every hit, and add small timing variations to the grid: that combination is what separates a stiff loop from a groove that sits naturally in a mix. Success looks like a pattern you forget is programmed, one where the kick, snare, and hi-hat breathe the way a drummer's hands and feet would. Everything below expands on that single rule.
TL;DR:
- Using a drum map ensures accurate triggering of articulations and reduces the need for manual note reassignment when swapping sound sources or kits.
- Layering velocity and micro-timing variations effectively creates a more natural groove that mimics human drummers, especially when programmatically applied through small nudges.
- Referencing real drummer performances and extracting groove templates significantly improves the feel of programmed beats, making them sound more human and less mechanical.
- MIDI effects like randomizers and groove quantize plugins are best used after establishing the main pocket to add subtle variation without disturbing the rhythm.
- Hardware or electronic drum pads should be routed through the same mapping principles, with attention to latency, to integrate seamlessly into a realistic and flexible MIDI drum workflow.
Table of Contents
- Core concepts: General MIDI, Channel 10, and drum maps
- DAW and instrument setup: routing, outputs, and templates
- Programming core grooves: kick, snare, and hi-hat techniques you can apply now
- Humanization: quantize, swing, and micro-timing
- Articulations, layering, and round-robin to remove repetition
- Arranging and variations: fills, transitions, and exporting patterns
- Common pitfalls and quick fixes
- How The DeputIE speeds idea generation and MIDI export
- Using MIDI effects and plugins for drum programming
- Programming percussion dynamics beyond velocity
- Creating grooves by referencing real drummers
- Integrating hardware drum machines and electronic pads
- When programming beats is the right choice
- Try DeputIE for faster idea generation and MIDI export
- Sources
- FAQ
Core concepts: General MIDI, Channel 10, and drum maps
General MIDI Level 1 sets aside Channel 10 as the dedicated percussion channel, mapping note numbers 35 through 81 to a fixed set of drum sounds so that a MIDI file plays back consistently across different devices and software. The General MIDI Level 1 developer guidelines exist for exactly that reason: predictable playback no matter what plays the file.
That baseline has limits. GM gives you one sound per note number, while a modern sampler or drum plugin often ships with dozens of articulations, velocity layers, and alternate hits mapped across the keyboard. A GM-authored pattern dropped into a sampler like Superior Drummer or BFD will often trigger the wrong sound, or nothing at all, because the sampler's internal map does not match GM's.
Drum maps solve that mismatch. A drum map sits between your MIDI input and the instrument's output, translating an incoming note (the I-Note) into whatever note the sampler actually expects to trigger (the O-Note). You can play or program on a comfortable, familiar layout while the map silently redirects each hit to the correct articulation inside the instrument, a workflow detailed in Cubase's drum map documentation.

The GM percussion key map remains the reference point for this translation work. Here are the notes you will use constantly:
Memorizing just these five notes covers most of a basic beat, and any custom drum map you build should treat them as the anchor points before you branch into toms, percussion, or alternate articulations.
DAW and instrument setup: routing, outputs, and templates
Getting notes to trigger the right sound reliably starts with how you build the track, not with how you play it. Follow this sequence when setting up a new kit:
- Create a MIDI track and load your drum instrument, whether that is a built-in drum machine, a sampler, or a multisampled kit plugin.
- Decide between single-output and multi-output routing: single output sends everything through one stereo bus, while multi-output splits the kick, snare, hats, and overheads to separate channels so you can mix and process each piece independently.
- Load or build a drum map for that instrument, matching each I-Note (what you play or program) to the correct O-Note (what the sampler needs to receive), following the method outlined in MusicTech's Cubase drum map tutorial.
- Test every pad or note by ear against the instrument's own documentation, since a single wrong O-Note assignment can silently swap your snare for a cowbell.
- When a part needs heavier layering, split the rhythm across two or three tracks, one for the main pattern and others carrying alternate velocity layers or extra articulations that feed the same instrument.
- Save the finished setup as a template, including the drum map itself, so the next project starts with correct routing already in place.
Drum maps and templates matter most when you swap sound sources mid-project. Without a saved map, switching from one kit to another forces you to manually reassign every note, and a template converts that from a repeated chore into a one-click load.
Programming core grooves: kick, snare, and hi-hat techniques you can apply now
The core of nearly every programmed beat is the relationship between kick, snare, and hi-hat, and each one rewards a slightly different approach.
- Kick: decide early whether the part sits in the pocket or pushes into syncopation, and keep velocity contrast between the primary downbeats and any secondary hits so the low end does not turn into a wall of equal-weight thuds.
- Snare: anchor the backbeat with a centered, full-velocity hit, then build ghost notes around it at noticeably lower velocities, since real players rarely strike a snare at the same intensity twice in a bar.
- Hi-hat: stack velocities across the 16th or 32nd-note grid rather than flattening them, push open hits onto off-beats where a drummer's foot would naturally lift, and nudge a few hits slightly off the grid rather than leaving every sixteenth perfectly locked.
Style changes what you emphasize more than it changes the underlying rules. A hip-hop groove usually wants a heavier kick with sparse snare placement and swung hats. A pop groove tends toward a tighter, more even hi-hat pattern with a strong, consistent snare. A house groove typically needs a four-on-the-floor kick with the hi-hat carrying most of the rhythmic interest through open and closed contrasts.
Many producers lean on sampled kits with genuine velocity layers rather than single-hit samples, because that dynamic range is what makes contrast between a ghost note and a full hit sound like two different physical strikes instead of one sound turned down, a point echoed across sampler tutorials covering libraries like Superior Drummer and BFD.
Pro Tip: Program the main pocket first, locking in kick, snare, and hat placement, then go back on a second pass to add ghost notes and micro-variations once the groove already feels right.
That two-pass method keeps you from chasing realism before the arrangement itself is solid, a sequence Sound On Sound's drum map walkthrough also recommends when building out a kit part.
Humanization: quantize, swing, and micro-timing
Strict quantize snaps everything to the grid and works well for electronic genres where rigidity is the point. Loose quantize, often set to 50 to 70 percent strength, pulls notes toward the grid without erasing the small variations that make a part feel played rather than typed. Groove templates, extracted from real performances, apply that same pulling effect using an actual rhythmic fingerprint instead of a flat percentage.
- Nudge individual hits by small amounts, generally no more than a few milliseconds per instrument, rather than applying one blanket random offset to the whole kit.
- Apply swing either at the bar level for a consistent feel across the whole pattern, or instrument by instrument when you want the hi-hat to swing more than the snare.
- Match your swing amount to the subdivision you are working in, since an eighth-note swing and a sixteenth-note swing read very differently even at the same percentage setting.
- Map velocity ranges to sample layers deliberately: a ghost note might sit between 20 and 40, a normal hit between 70 and 100, and an accent above 110, so the instrument crossfades into louder, more aggressive samples exactly when you want it to.
Small velocity differences of roughly 8 to 12 MIDI units, combined with those micro-timing nudges, tend to produce a far more convincing result than large randomization settings, which often introduce sloppiness instead of feel, as noted in Sound On Sound's Cubase drum map piece.
Articulations, layering, and round-robin to remove repetition
Repetition is the fastest way to expose a programmed part as programmed. Mapping and layering techniques exist specifically to break that pattern.
- Map distinct notes for different articulations, such as snare rim versus center, or hi-hat pedal versus closed hat, instead of forcing one note to represent several physically different sounds.
- Layer a transient sample with a longer body sample and crossfade between them by velocity, which is standard practice for libraries built around multisampled, velocity-layered kits.
- Use round-robin cycling when your sampler supports it, letting consecutive hits of the same note rotate through several recorded samples automatically.
- Alternate manually between two or three similar samples on repeated notes when your instrument has no round-robin feature, which achieves a similar effect with more setup work.
As a general guideline, reserve separate notes for genuinely different articulations and reserve velocity layering for variations in intensity of the same articulation. Mixing the two approaches on a single note tends to produce unpredictable triggering once you start editing the pattern later.
Arranging and variations: fills, transitions, and exporting patterns
A loop becomes an arrangement once you introduce change over time, and fills are usually the first tool for that.
- Design fills around the song's needs rather than technical flash: a simple snare roll into the chorus often serves the track better than a dense tom pattern.
- Flip individual elements between sections, swapping the hi-hat pattern or adding a tambourine layer in the second verse, so listeners register change without a full pattern rewrite.
- Use velocity envelopes and automation to let a loop evolve gradually, raising hi-hat velocity slightly across eight bars to build intensity into a drop or chorus.
- Export the finished MIDI pattern once it is solid, and keep a library of exported patterns you can re-import into future projects as a starting point rather than programming every groove from zero.
That exported-pattern habit is worth building early. A folder of proven kick-snare-hat combinations saves real time once you have a few dozen projects behind you.
Common pitfalls and quick fixes
Most MIDI drum problems trace back to a small number of recurring causes.
- Mapping mismatch: if a note triggers the wrong sound, check the O-Note assignments in your drum map first, since this is the most common source of unexpected triggers.
- Harsh or clipped transients: rebalance your velocity curve and the mix between layered samples rather than reaching for a limiter, since the source of the harshness is usually the layering itself.
- Phase problems from layering: sum layered hits to mono and check for cancellation, and align transients manually if a kick or snare sounds thin despite having full-volume layers underneath it.
- When editing stops working: if a part needs more fixes than it would take to reprogram it, stop patching and start over. A fresh pass is often faster than untangling a heavily edited one.
How The DeputIE speeds idea generation and MIDI export
The DeputIE is a composition tool built around visual sequencer workspaces and theory-guided suggestions, aimed at producers who want structured help getting from a blank project to a working idea. Its workspaces let you sketch rhythmic and melodic ideas visually before committing to a full arrangement, and it exports directly to MIDI for use in any DAW.
A practical workflow: sketch a rhythmic or melodic idea inside DeputIE, export it as a MIDI file, then bring that file into your DAW and apply the drum mapping and velocity layering techniques covered above. The DeputIE user manual walks through the export steps and workspace details for anyone setting this up for the first time.
Using MIDI effects and plugins for drum programming
Beyond manual editing, several categories of MIDI tools can speed up drum programming without replacing the fundamentals of mapping and velocity work. Arpeggiator-style plugins, more commonly used on melodic parts, can also drive rapid hi-hat or percussion patterns when fed a sustained note, generating evenly spaced subdivisions you then humanize afterward.
Randomizer plugins apply controlled variation to velocity, timing, or note choice across a pattern, which can substitute for some of the manual nudging described earlier, though the results usually need auditioning rather than blind trust. A randomizer set too aggressively will undo the pocket you worked to establish.
Groove quantize plugins extract the timing feel from a reference performance and apply it to your programmed part, shifting each hit toward the reference's own timing fingerprint rather than a flat grid. This differs from a simple quantize-strength setting because it pulls toward an actual rhythmic shape instead of an even percentage.
These tools work best layered into the workflow at specific points: a randomizer on a second pass after the main pocket is locked, a groove quantize plugin applied early if you are matching a particular feel from the start, and an arpeggiator reserved for generating raw material you then edit by hand rather than trusting as a finished part.
Programming percussion dynamics beyond velocity
Velocity controls loudness and, in multisampled kits, which sample layer plays, but it is not the only expressive control available on a drum track. Many sampled drum instruments respond to MIDI continuous controller data, commonly CC1 or a dedicated CC assigned by the instrument, to blend between open and closed hi-hat positions, control cymbal choke amount, or adjust the mix between close and room microphones on a snare.
Layering itself is a form of dynamic control that goes beyond a single note's velocity. Stacking a tight, close-mic snare sample under a looser room sample and adjusting their relative levels across a section changes the perceived energy of a part independent of how hard any individual hit is programmed.
Combining CC automation with velocity programming gives you two separate dimensions to shape a part: velocity decides how hard a hit lands, and CC control decides what kind of hit it is at that moment, whether that means a half-open hi-hat position or a choked cymbal. Treating these as separate controls, rather than trying to force everything through velocity alone, is usually what separates a flat-sounding programmed kit from one with real dimension.

Creating grooves by referencing real drummers
One of the most reliable ways to make a programmed beat feel played is to study how an actual drummer approaches the same pattern. Listening closely to where a drummer places ghost notes, how far ahead of or behind the beat their hi-hat sits, and which hits they accent reveals timing and dynamic choices that are easy to miss when programming from theory alone.
Groove templates extracted from real performances, mentioned earlier in the context of quantize, are a direct way to borrow that feel programmatically. Applying one to a programmed pattern pulls your hits toward the timing relationships a human drummer actually played, rather than an idealized grid.
Beyond templates, transcribing a short reference pattern by ear and rebuilding it note by note, including the exact ghost note placements and velocity relationships, teaches you the kind of micro-decisions that do not show up in a quantize percentage or a swing setting. That transcription habit, applied across a handful of reference tracks in a genre you work in often, tends to improve programmed grooves faster than tweaking plugin settings alone.
Integrating hardware drum machines and electronic pads
Hardware drum machines and electronic drum pads bring their own MIDI implementation quirks into a programming workflow, and most of the same mapping principles apply. A hardware pad controller typically sends fixed MIDI notes per pad, which you then route through a drum map inside your DAW exactly as you would a virtual instrument, translating the pad's note into whatever note your sampler expects.
Latency is the main practical concern when playing hardware pads live into a DAW. Check your audio interface's buffer size first, since a buffer set too high introduces a noticeable lag between striking a pad and hearing the sound, which throws off the timing of anything you record in real time.
Drum machines with their own internal sequencers can still export or sync via MIDI, letting you use the hardware's own sound engine while editing the underlying pattern in your DAW afterward. Many producers also pull one-shot samples from hardware machines into their software sampler, which keeps the character of the hardware sound while gaining the editing flexibility of a MIDI-based workflow. Pairing those one-shots with sample packs, such as Boom Bap Essentials 2, gives you additional raw material to layer against programmed hits for a hybrid acoustic and electronic texture.
When programming beats is the right choice
Programming wins when you need speed, consistency, or a sound a human kit cannot produce, while playing wins when a part needs the subtle push and pull only a real performance carries. Templates make programming fast for genre-standard patterns. A chorus that needs to breathe, or a fill that has to land exactly on a lyric, is often worth the extra time to program by hand rather than lean on a preset.
— Vigilantie
Try DeputIE for faster idea generation and MIDI export
DeputIE's visual sequencer and theory-guided workspaces help you move past a blank project page by sketching rhythmic and melodic ideas before you commit to a full arrangement.
- Export one pattern from DeputIE and test it against the mapping techniques covered above in your own DAW.
- The DeputIE user manual covers the export steps in detail.
- Plans are available as Monthly or Annual subscriptions following a free trial.
Sources
- Midi
- General MIDI percussion key map (MuseScore PDF)
- Cubase: How to create Drum Maps — Sound On Sound
- Learn how to use Drum Maps in Steinberg Cubase | MusicTech
FAQ
What is the best MIDI drum program?
There is no single best program since the right choice depends on your DAW, budget, and whether you need a full sampled kit or a simple sequencer. Multisampled drum instruments with velocity layers and drum map support, paired with your DAW's own MIDI editor, cover most production needs.
What is the 80/20 rule in drumming?
This is not a standardized term with one agreed definition in drum programming or performance literature, and no established source in this guide defines it as a fixed rule. If you have encountered it in a specific context, treat it as that source's own shorthand rather than an industry standard.
What is the forbidden drum groove?
This phrase is not a recognized technical term within MIDI drum programming or General MIDI documentation. It likely refers to internet folklore around a specific drum pattern rather than any mapping or programming standard covered here.
What is the best way to program drums?
Start with a drum map matched to your instrument, program the main kick, snare, and hi-hat pocket first, then add ghost notes, velocity variation, and small timing offsets on a second pass. That sequence, covered in detail above, consistently produces more realistic results than trying to humanize everything at once.
Do I need a drum map if I only use one sampler?
If your sampler's note layout already matches how you like to play or program, a drum map is less urgent, though saving one still protects you when you switch kits later. Most producers who work across multiple sample libraries find a saved drum map template saves significant setup time per project.